How to Setup OAuth2/OIDC Federation in OpenAM
Original article: https://github.com/OpenIdentityPlatform/OpenAM/wiki/How-to-Setup-OAuth2-OIDC-Federation-in-OpenAM
Introduction
In the following manual, we will set up a federation between two OpenAM instances via OAuth2/OIDC protocol. One OpenAM instance we will set up as OAuth2/OIDC Server - Identity Provider (IdP), and another instance OAuth2/OIDC client - Service Provider (SP).Thus, you can authenticate to an OpenAM client instance (SP) using OpenAM instance credentials (IdP) using the OAuth2/OIDC protocol.
OpenAM Instances Installation
If you already have OpenAM instances installed, you can skip this section. For demonstration purposes, we will install OpenAM IdP and SP in Docker containers.
Network Setup
Add hostnames and IP adress to the hosts file.
127.0.0.1 idp.acme.org sp.mycompany.org
In Windows hosts file located at C:\Windows\System32\drivers\etc\hosts directory. Un Linux and Mac the file location is /etc/hosts
Create a Docker network for OpenAM instances
docker network create openam-oauth
OpenAM IdP Installation
Run OpenAM Docker Container
docker run -h idp.acme.org -p 8080:8080 --network openam-oauth --name openam-idp openidentityplatform/openam
Once the OpenAM server is running, perform the initial configuration by running the following command and wait for the configuration to complete.
docker exec -w '/usr/openam/ssoconfiguratortools' openam-idp bash -c \
'echo "ACCEPT_LICENSES=true
SERVER_URL=http://idp.acme.org:8080
DEPLOYMENT_URI=/$OPENAM_PATH
BASE_DIR=$OPENAM_DATA_DIR
locale=en_US
PLATFORM_LOCALE=en_US
AM_ENC_KEY=
ADMIN_PWD=passw0rd
AMLDAPUSERPASSWD=p@passw0rd
COOKIE_DOMAIN=idp.acme.org
ACCEPT_LICENSES=true
DATA_STORE=embedded
DIRECTORY_SSL=SIMPLE
DIRECTORY_SERVER=idp.acme.org
DIRECTORY_PORT=50389
DIRECTORY_ADMIN_PORT=4444
DIRECTORY_JMX_PORT=1689
ROOT_SUFFIX=dc=openam,dc=example,dc=org
DS_DIRMGRDN=cn=Directory Manager
DS_DIRMGRPASSWD=passw0rd" > conf.file && java -jar openam-configurator-tool*.jar --file conf.file'
OpenAM SP Installation
Run OpenAM Docker Container
docker run -h sp.mycompany.org -p 8081:8080 --network openam-oauth --name openam-sp openidentityplatform/openam
Once the OpenAM server is running, perform the initial configuration by running the following command and wait for the configuration to complete.
docker exec -w '/usr/openam/ssoconfiguratortools' openam-sp bash -c \
'echo "ACCEPT_LICENSES=true
SERVER_URL=http://sp.mycompany.org:8080
DEPLOYMENT_URI=/$OPENAM_PATH
BASE_DIR=$OPENAM_DATA_DIR
locale=en_US
PLATFORM_LOCALE=en_US
AM_ENC_KEY=
ADMIN_PWD=passw0rd
AMLDAPUSERPASSWD=p@passw0rd
COOKIE_DOMAIN=sp.mycompany.org
ACCEPT_LICENSES=true
DATA_STORE=embedded
DIRECTORY_SSL=SIMPLE
DIRECTORY_SERVER=sp.mycompany.org
DIRECTORY_PORT=50389
DIRECTORY_ADMIN_PORT=4444
DIRECTORY_JMX_PORT=1689
ROOT_SUFFIX=dc=openam,dc=example,dc=org
DS_DIRMGRDN=cn=Directory Manager
DS_DIRMGRPASSWD=passw0rd" > conf.file && java -jar openam-configurator-tool*.jar --file conf.file'
OAuth2/OIDC Server Setup
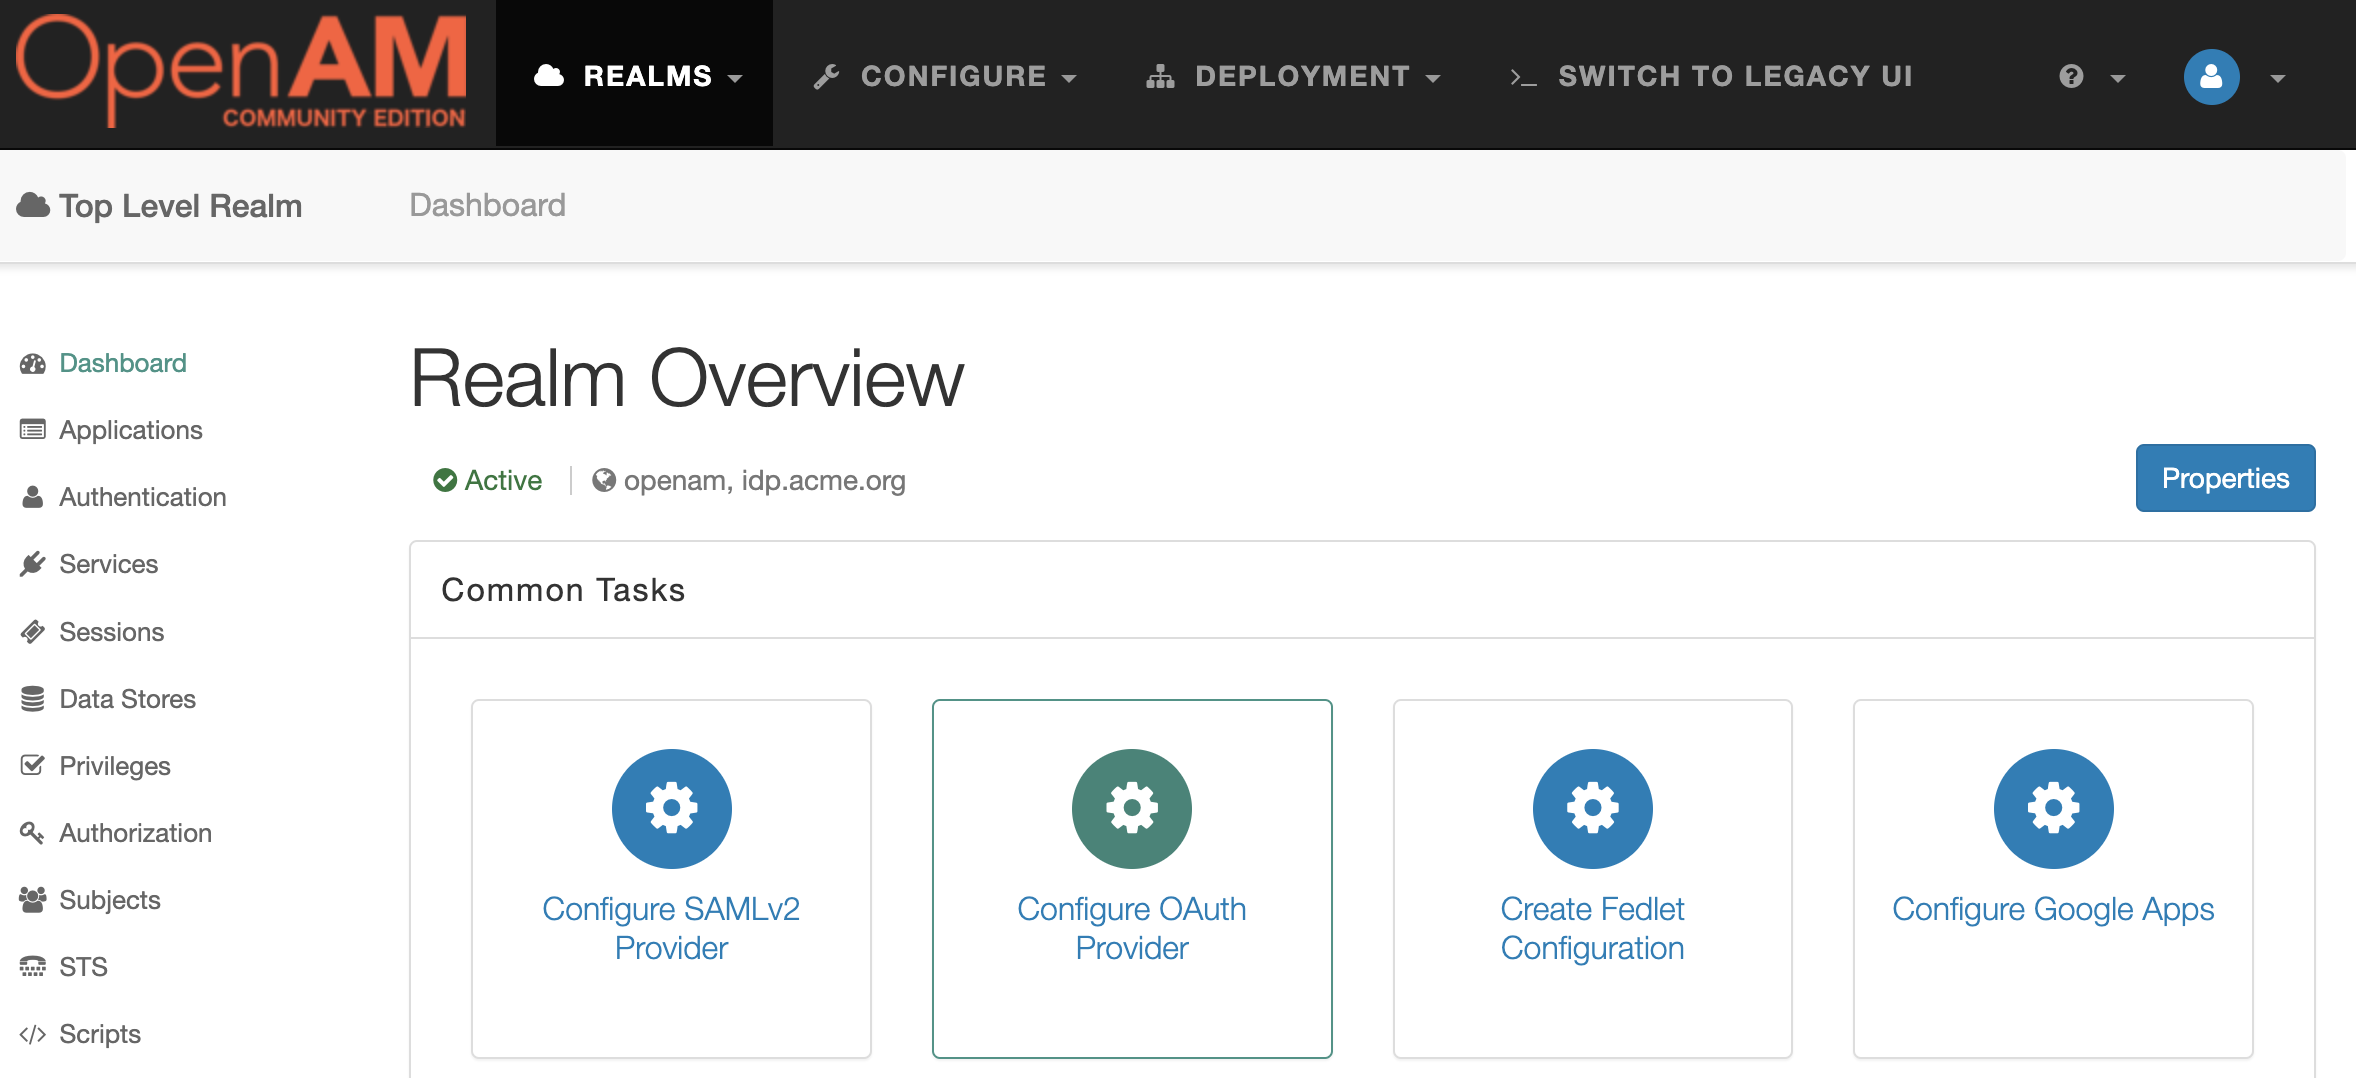
Open the OpenAM console, which will be in the role of the OAuth2/OIDC server at http://idp.acme.org:8080/openam. In the login field enter the amadmin value. In the password field enter the value from ADMIN_PWD option, in this case passw0rd.
Go to the root realm and in the Dashboard select Configure OAuth Provider.
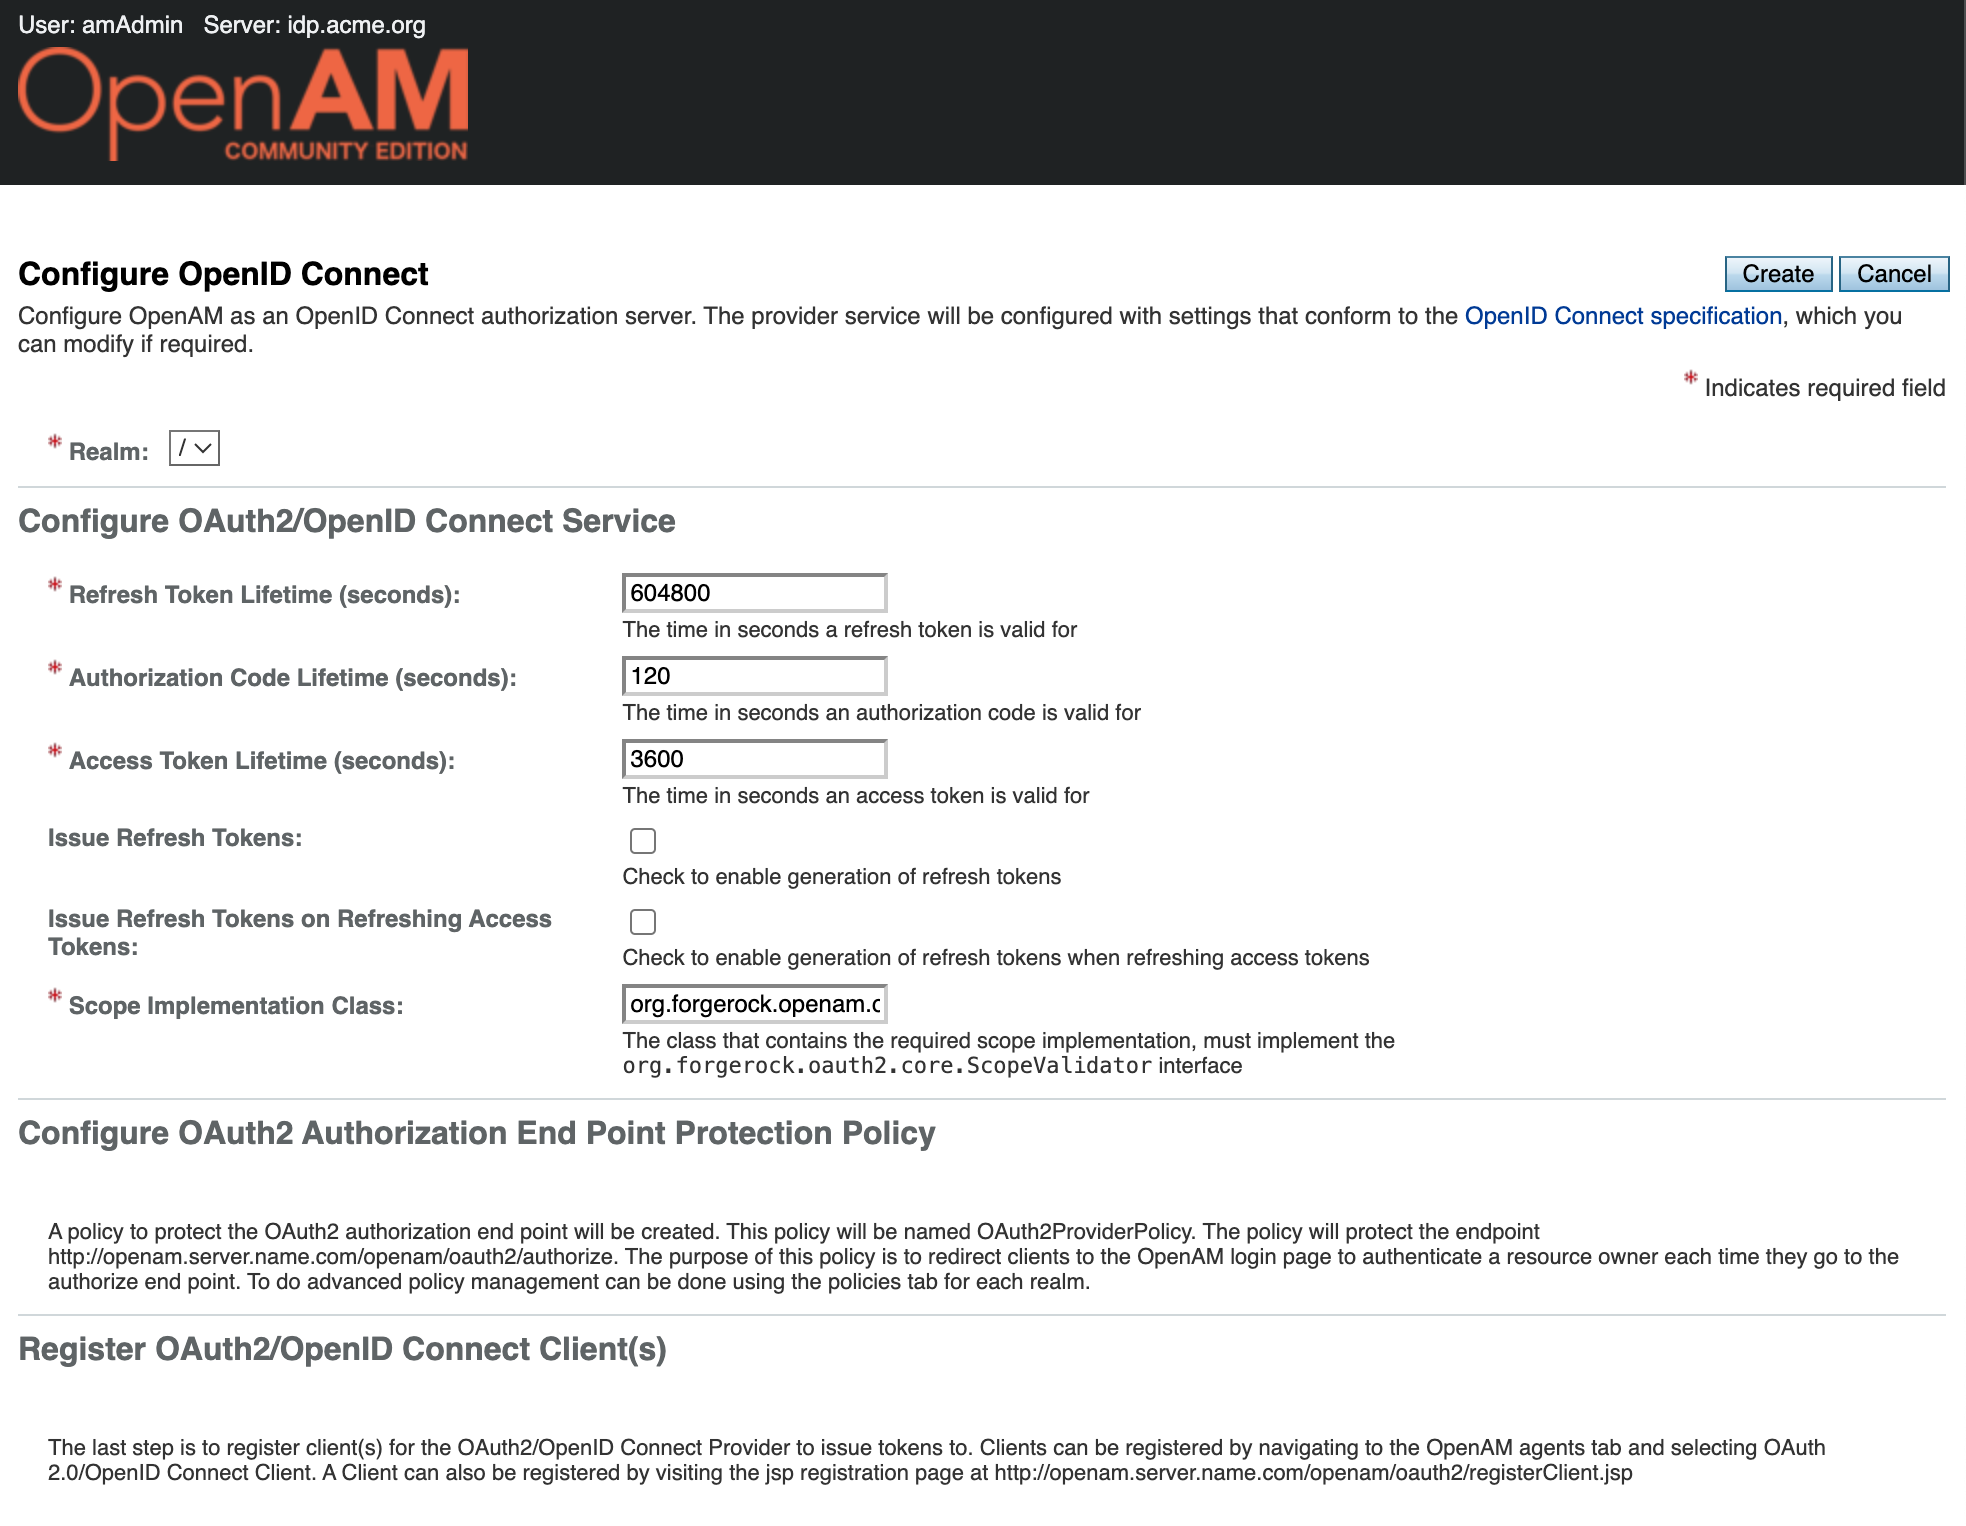
Next, Configure OpenID Connect.

Leave the settings unchanged and click the Create button.
Create a Client Application
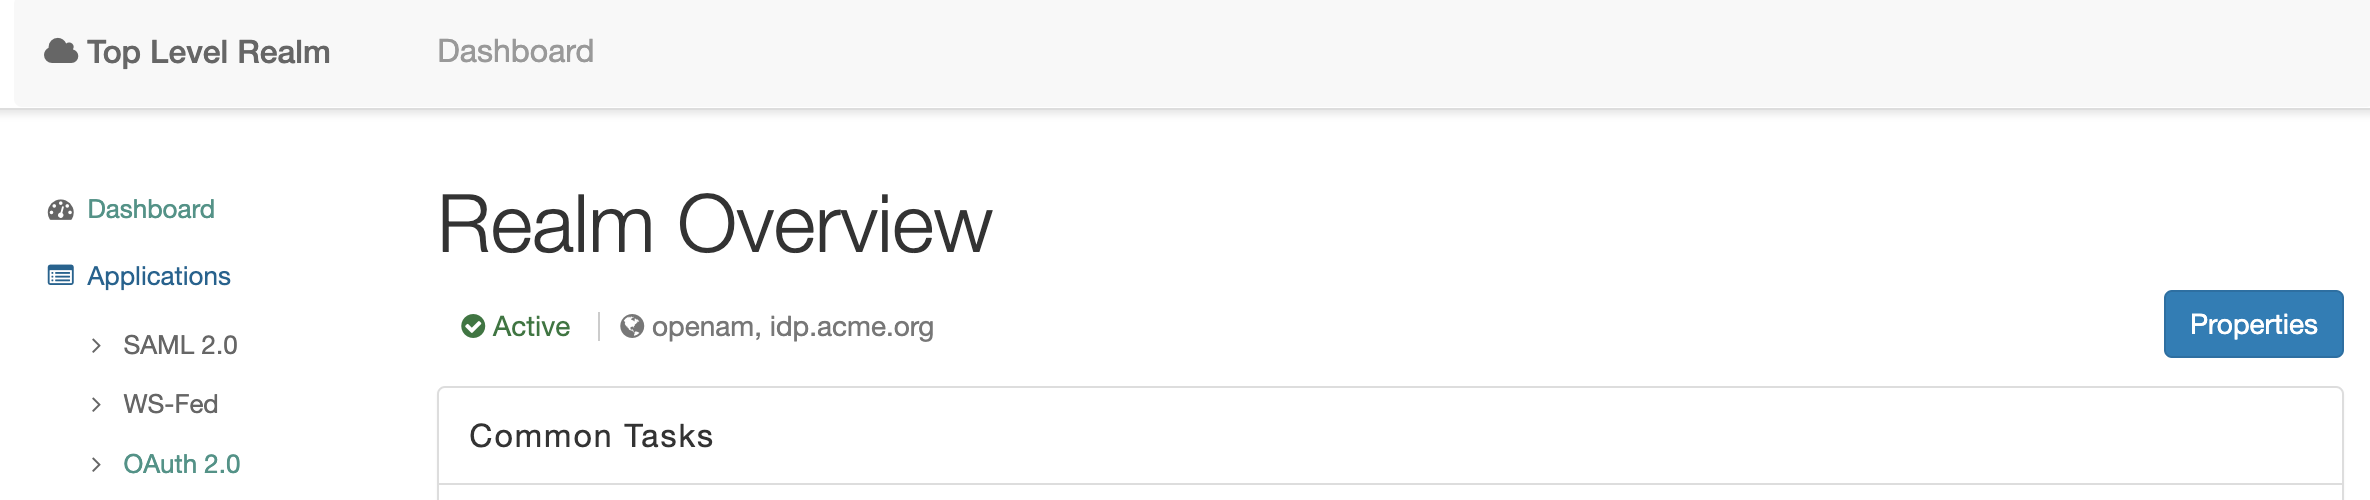
Open the OAuth2/OIDC server admin console, navigate to the desired realm and select Applications → OAuth 2.0 from the left menu
In the list, click the New button.
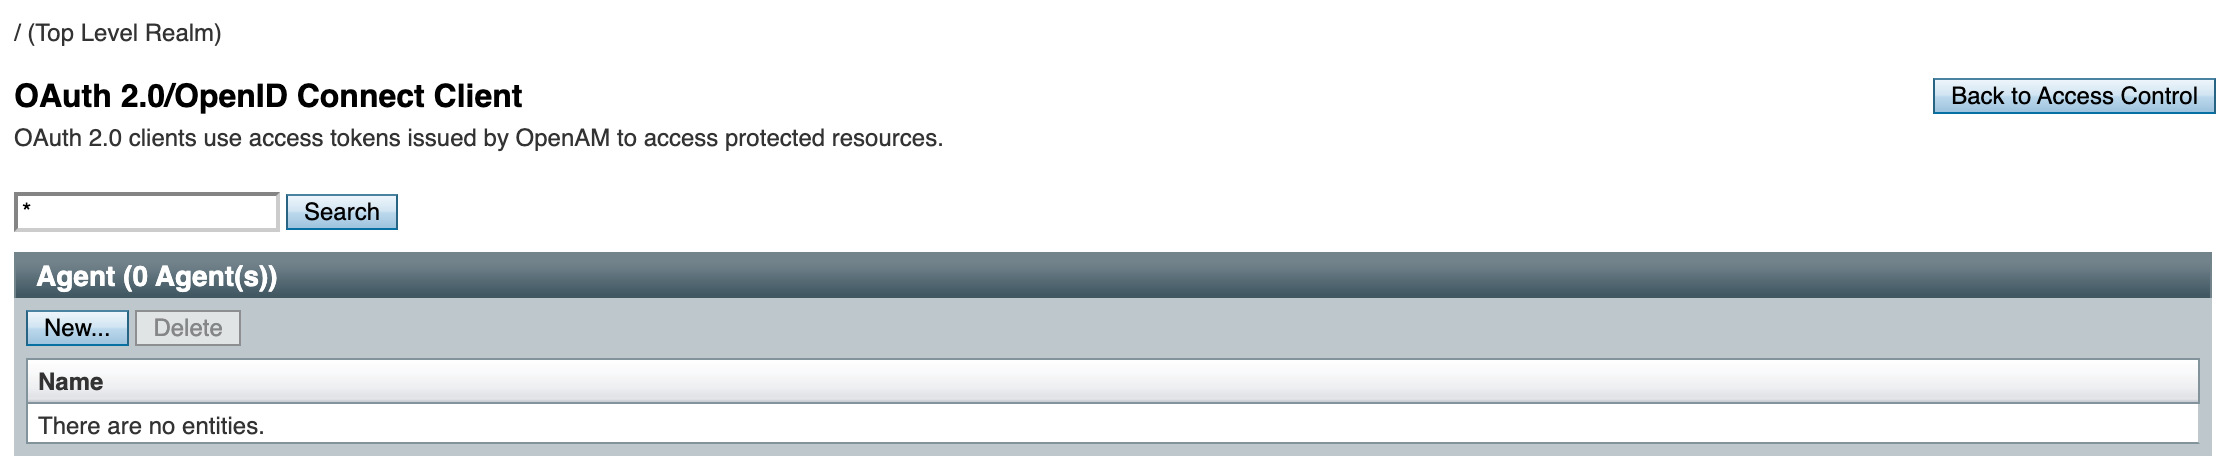
Fill the Name (client_id) and Password (client_secret) fields. Repeat the password and press the Create button.
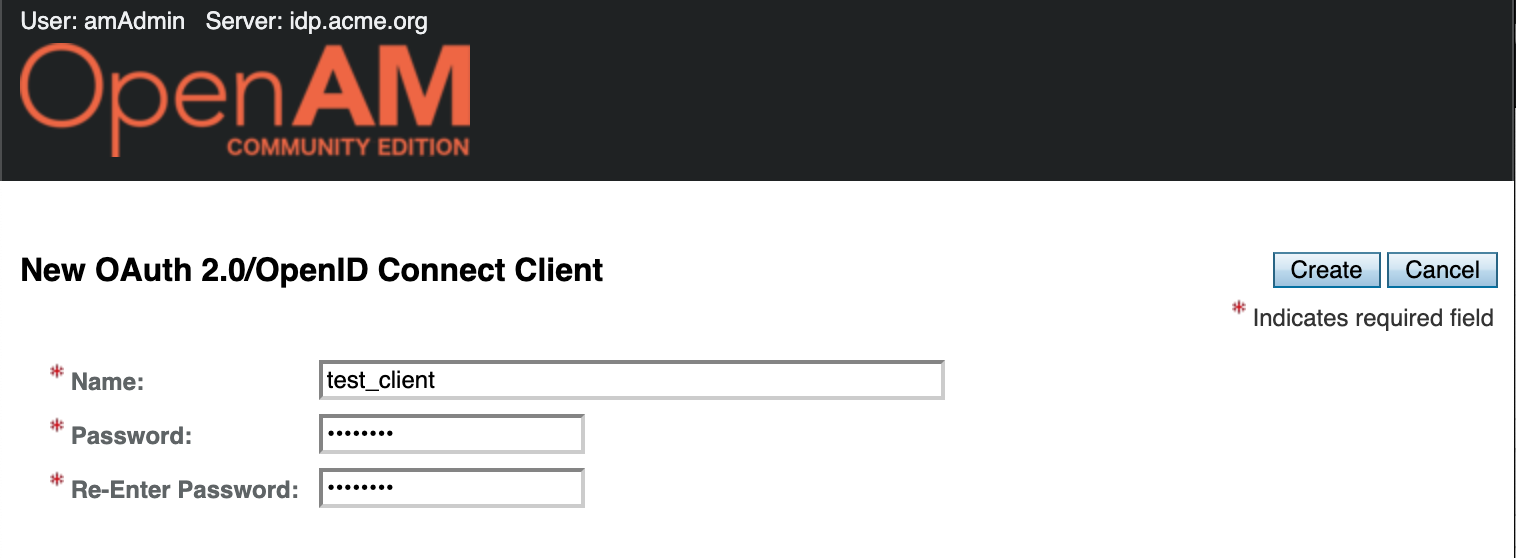
Open the created application and fill the settings. |Setting|Value| | — | — | | Redirection URIs | http://sp.mycompany.org:8081/openam/oauth2c/OAuthProxy.jsp | | Scope | openid | | Token Endpoint Authentication Method | client_secret_post | | ID Token Signing Algorithm | RS256 |
OAuth2/OIDC Client Setup
Create OAuth2/OIDC Authentication Module
Open the console of OpenAM, which will be in the role of OAuth2/OIDC client at http://openam-sp.example.org:8081/openam. In the login field enter the value amadmin, in the password field enter the value specified in the ADMIN_PWD setting, in this case passw0rd.
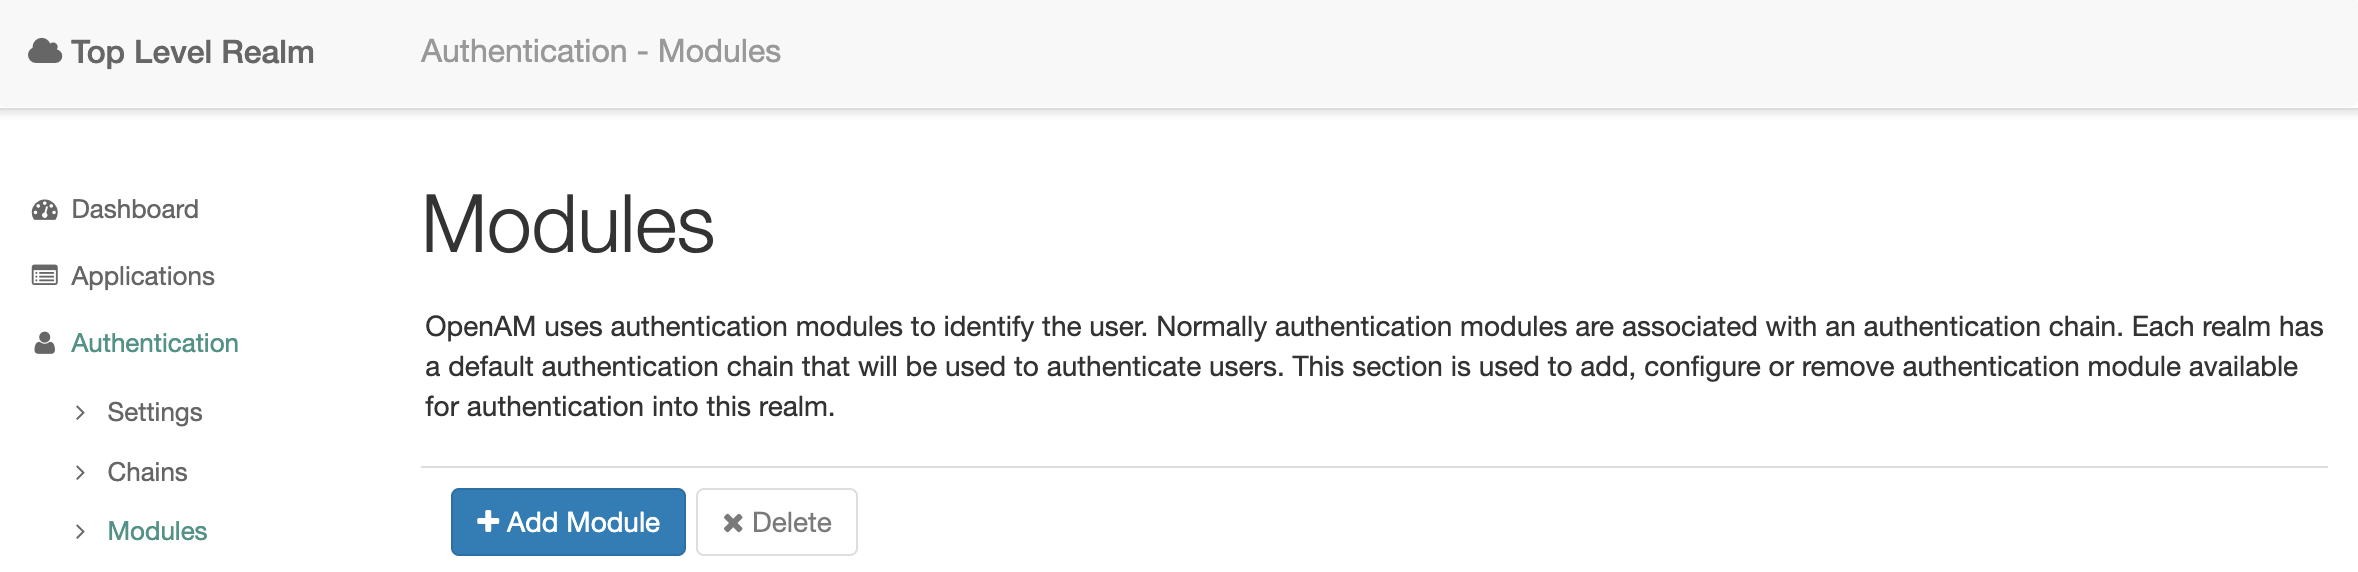
Open the realm and select Authentication → Modules from the left menu. Click the Add Module button.
Тип модуля выберите OAuth2/OpenID Connect, имя модуля может быть любым, путь оно будет oauth.
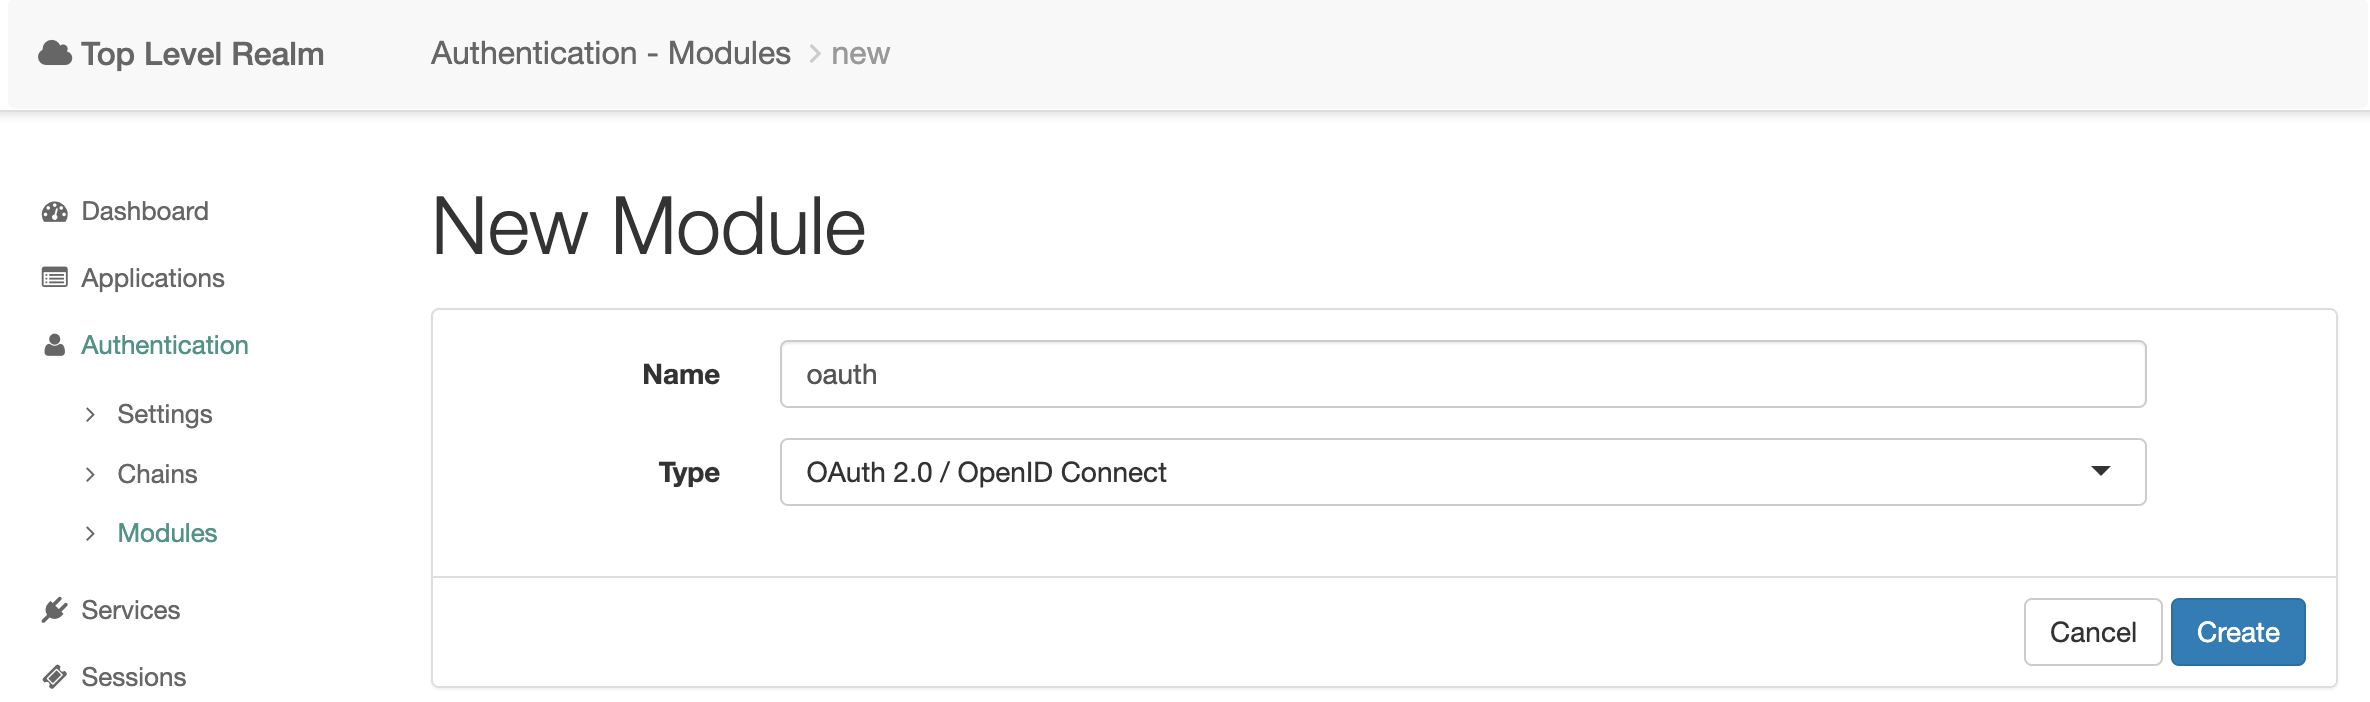
Press the Create button.
In the list, open the settings of the created module and fill in the settings:
| Setting | Value |
|---|---|
| Client Id | test_client |
| Client Secret | Password specified when registering the application |
| Authentication Endpoint URL | http://idp.acme.org:8080/openam/oauth2/authorize |
| Access Token Endpoint URL | http://idp.acme.org:8080/openam/oauth2/access_token |
| User Profile Service URL | http://idp.acme.org:8080/openam/oauth2/tokeninfo |
| Scope | openid |
| OAuth2 Access Token Profile Service Parameter name | access_token |
| Proxy URL | http://sp.mycompany.org:8081/openam/oauth2c/OAuthProxy.jsp |
| Account Mapper | org.forgerock.openam.authentication.modules.oidc.JwtAttributeMapper |
| Account Mapper Configuration | sub=uid |
| Attribute Mapper | org.forgerock.openam.authentication.modules.oidc.JwtAttributeMapper |
| Attribute Mapper Configuration | sub=uid |
| Create account if it does not exist | disabled |
| Prompt for password setting and activation code | disabled |
| Map to anonymous user | disabled |
| OpenID Connect validation configuration type | .well-known/openid-configuration_url |
| OpenID Connect validation configuration value | http://idp.acme.org:8080/openam/oauth2/.well-known/openid-configuration |
| Name of OpenID Connect ID Token Issuer | http://idp.acme.org:8080/openam/oauth2 |
Setup OAuth2/OIDC Authentication Chain
Open the OpenAM Service Provider administrator console. Select the realm and in the left menu go to Authentication → Chains.
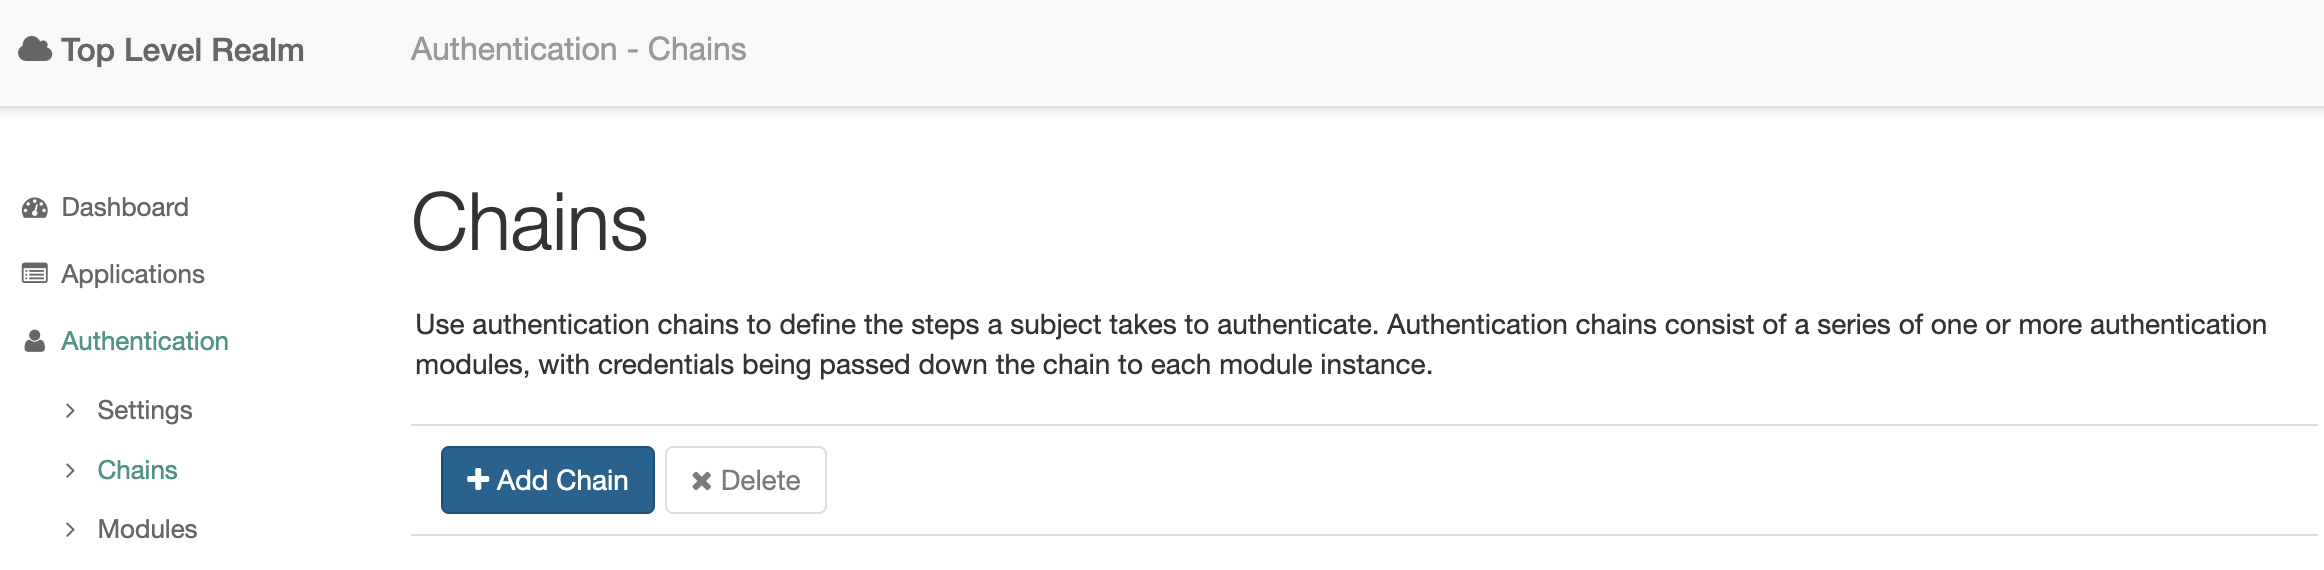
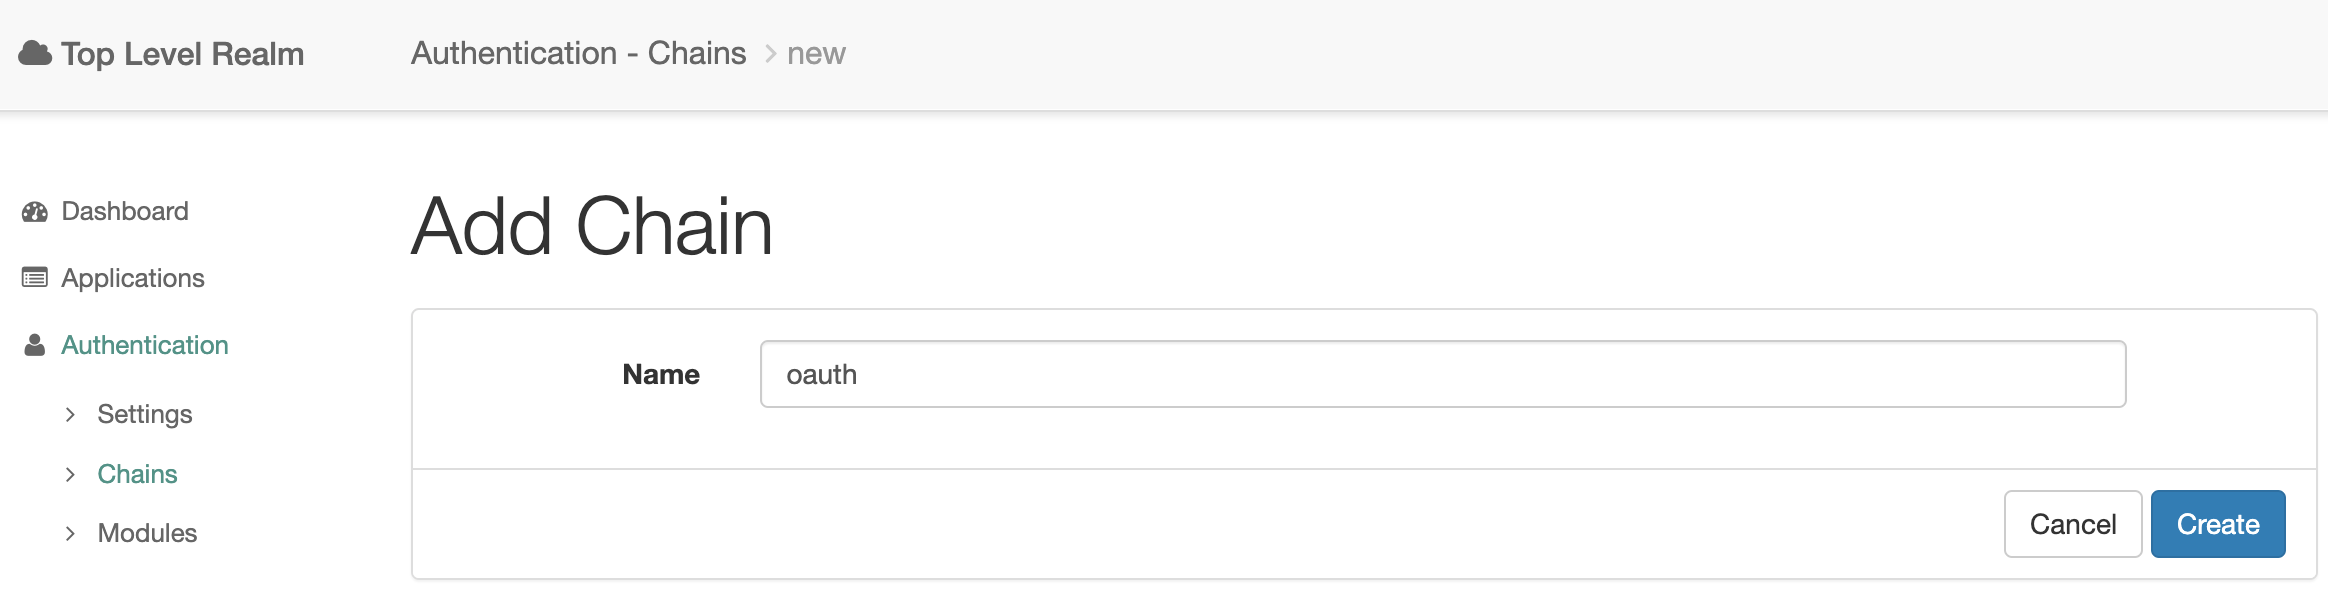
Create a new authentication chain
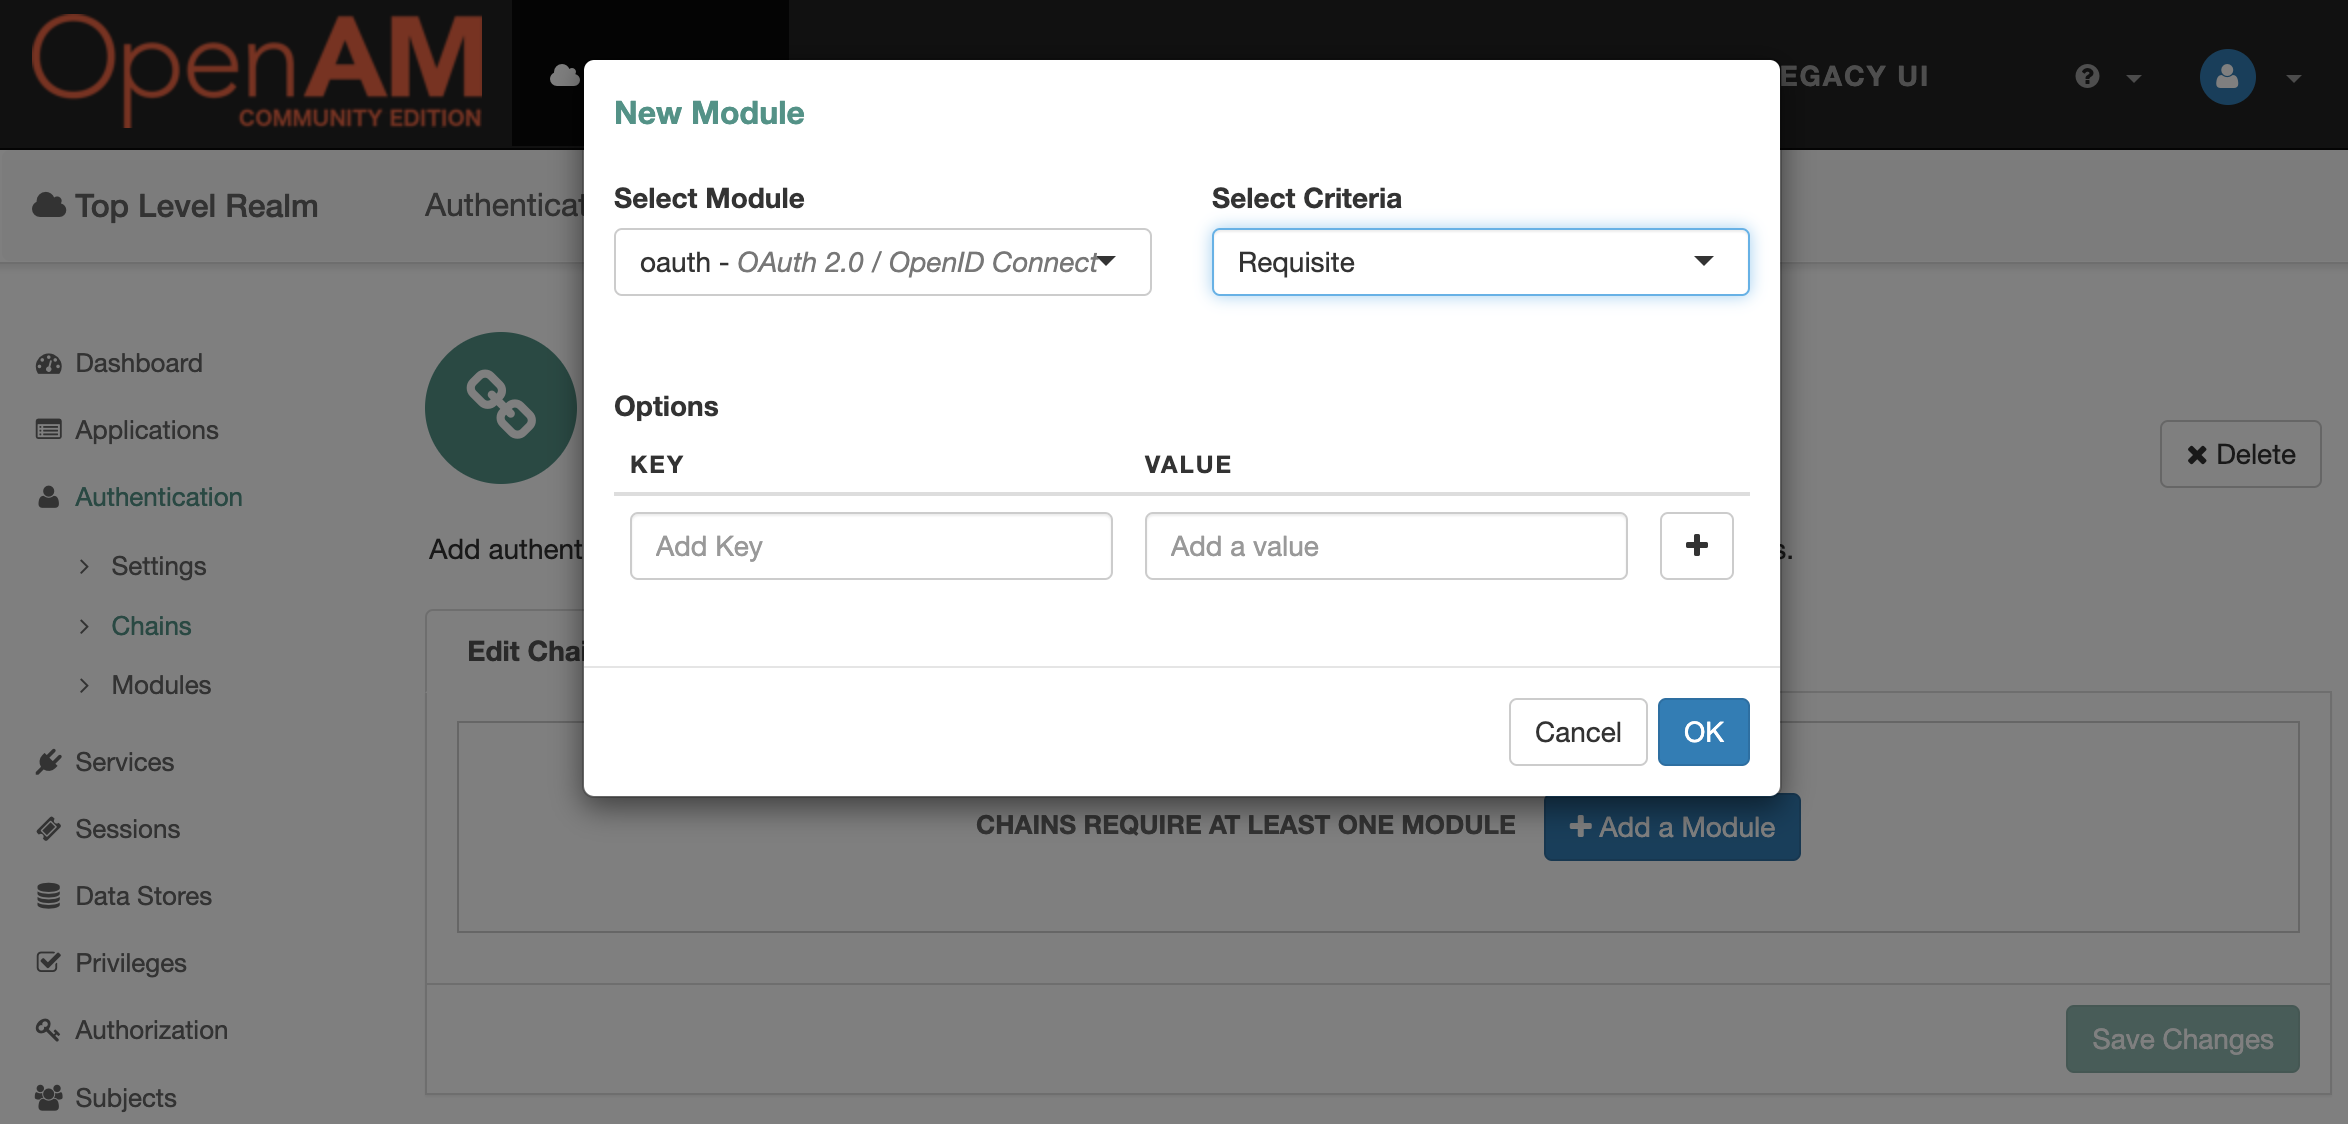
Click the Add a Module button and add the oauth module. Set the Criteria to Requisite. Click OK and then Save Changes.
Realm Setup
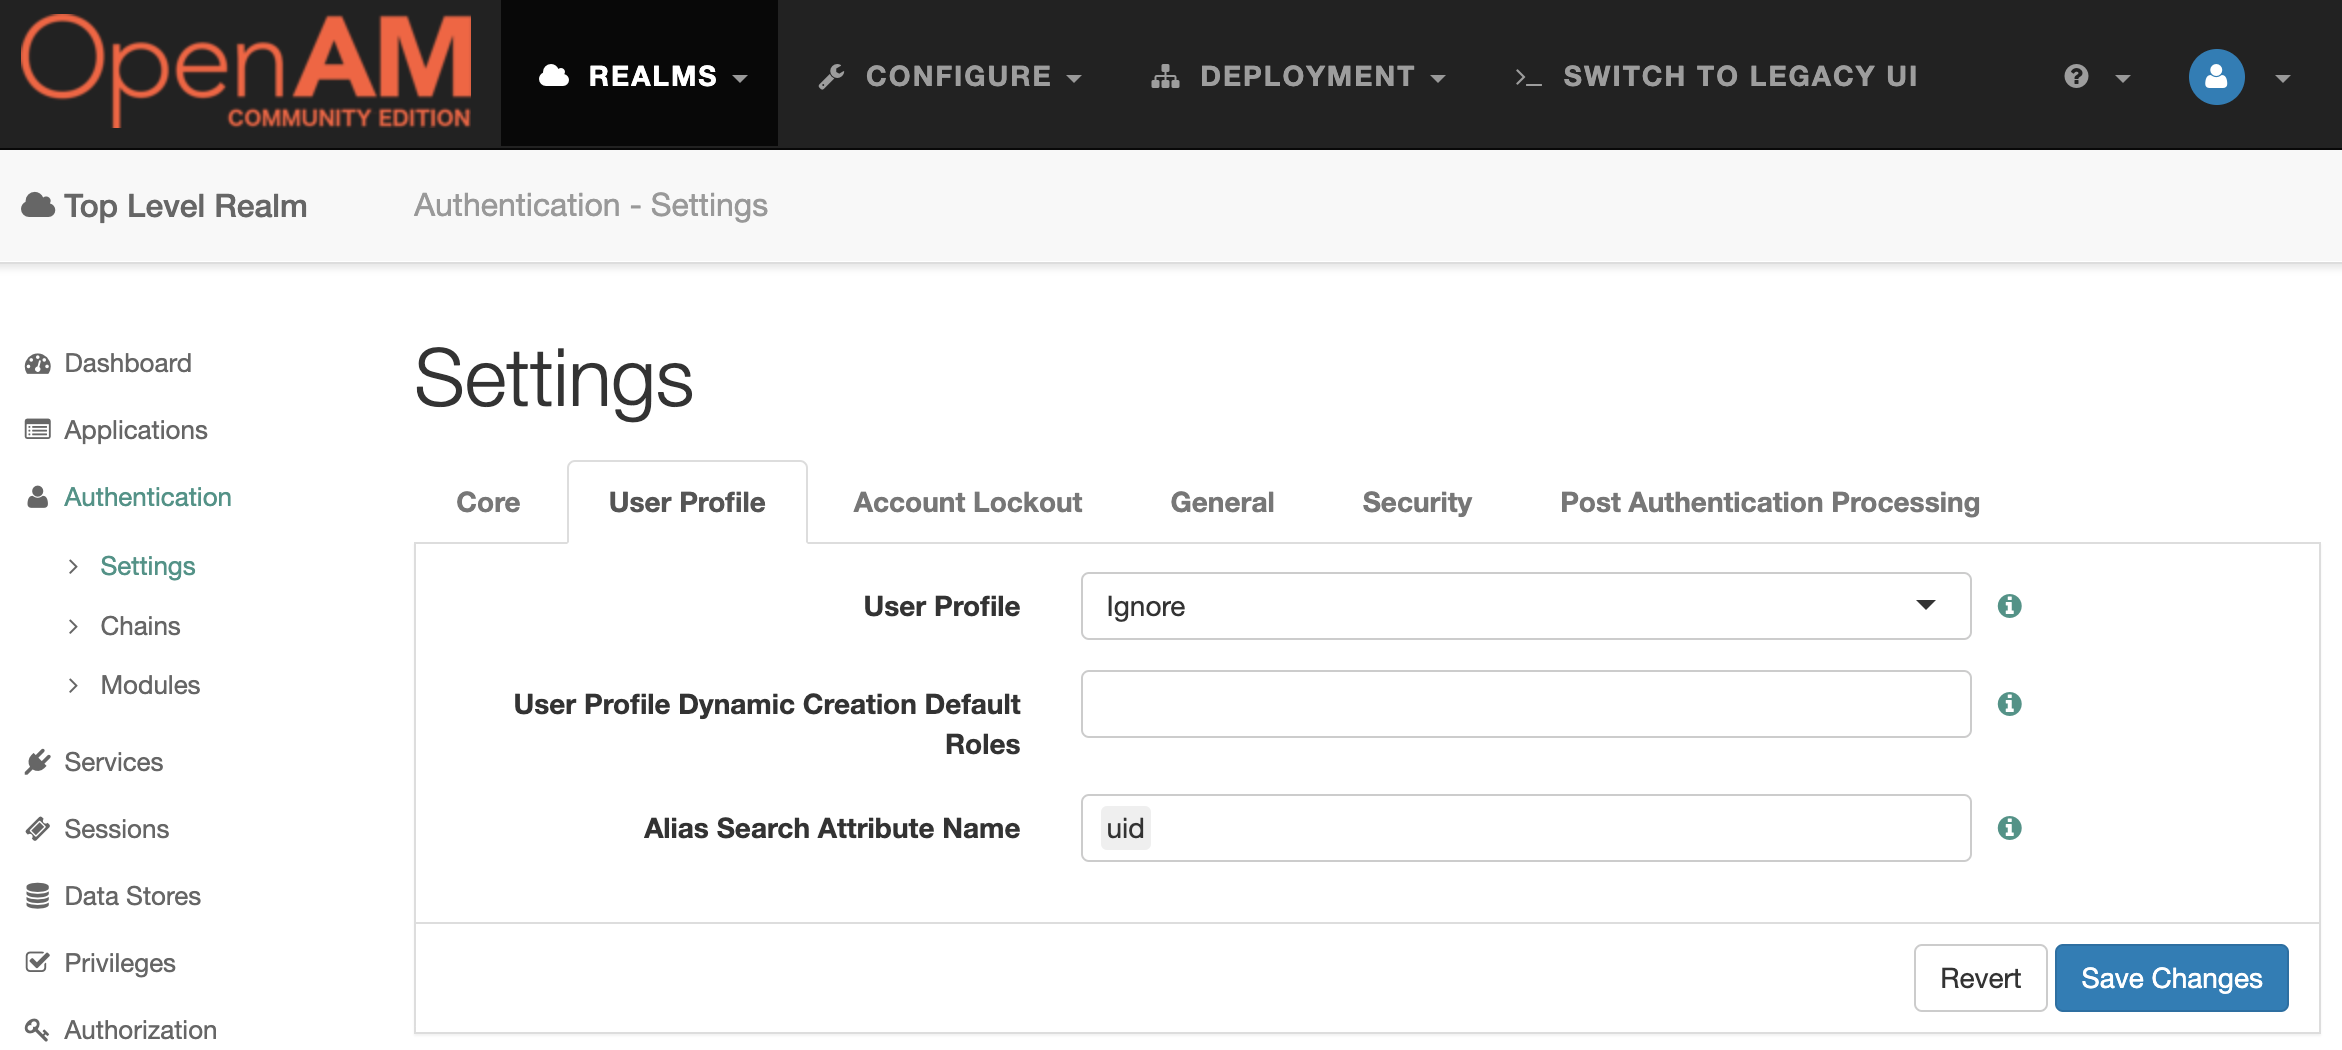
Go to the OpenAM SP administrator console. In the left menu, go to Authentication → Settings. On the User Profile tab, select Ignore. Save the changes.
Test the Solution
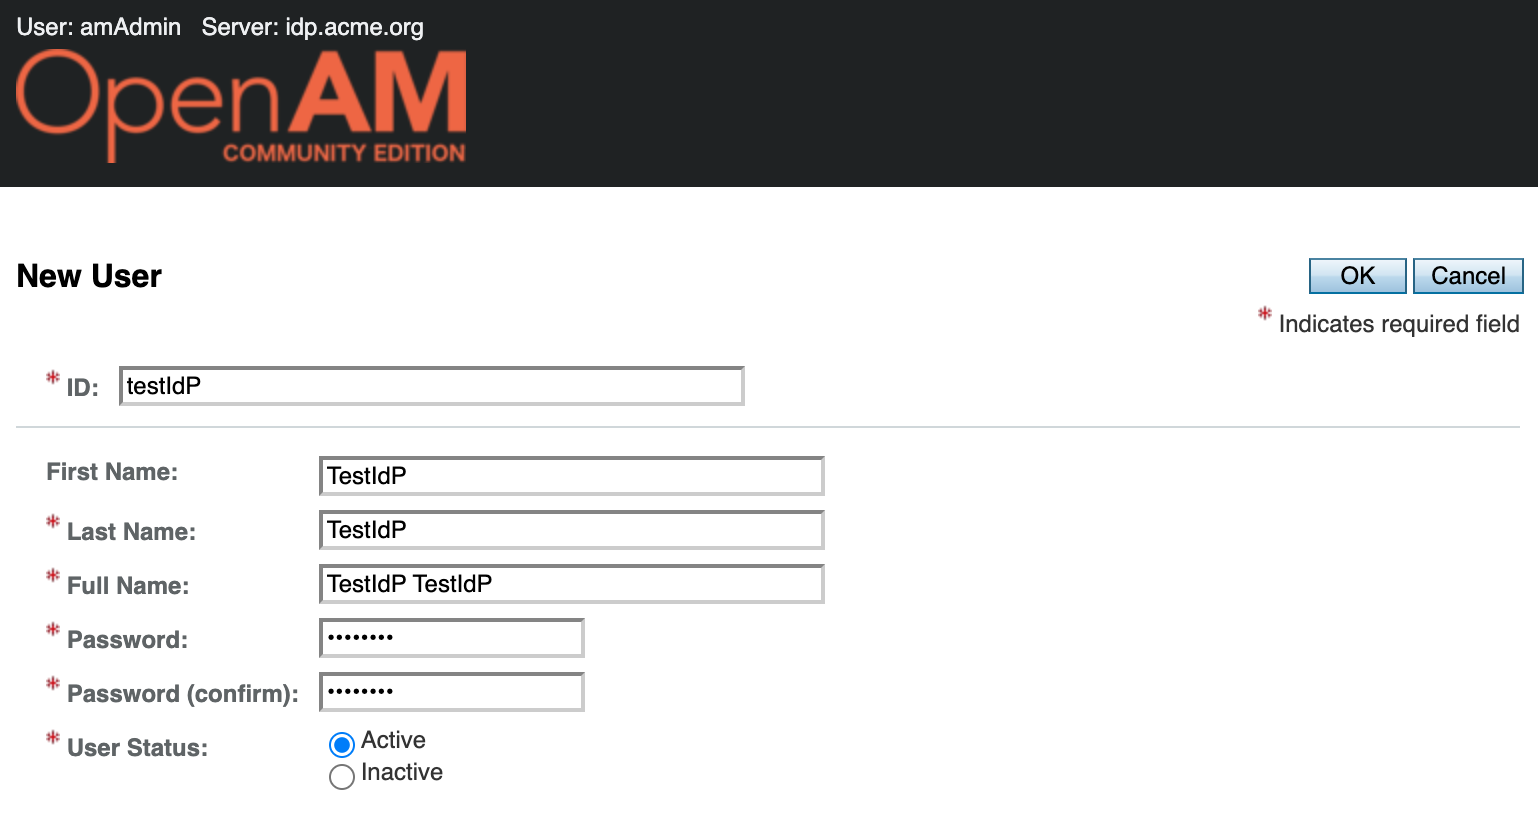
Go to the OpenAM OAuth2/OIDC Server admin console, select realm, under Dashboard in the left menu select Subjects.
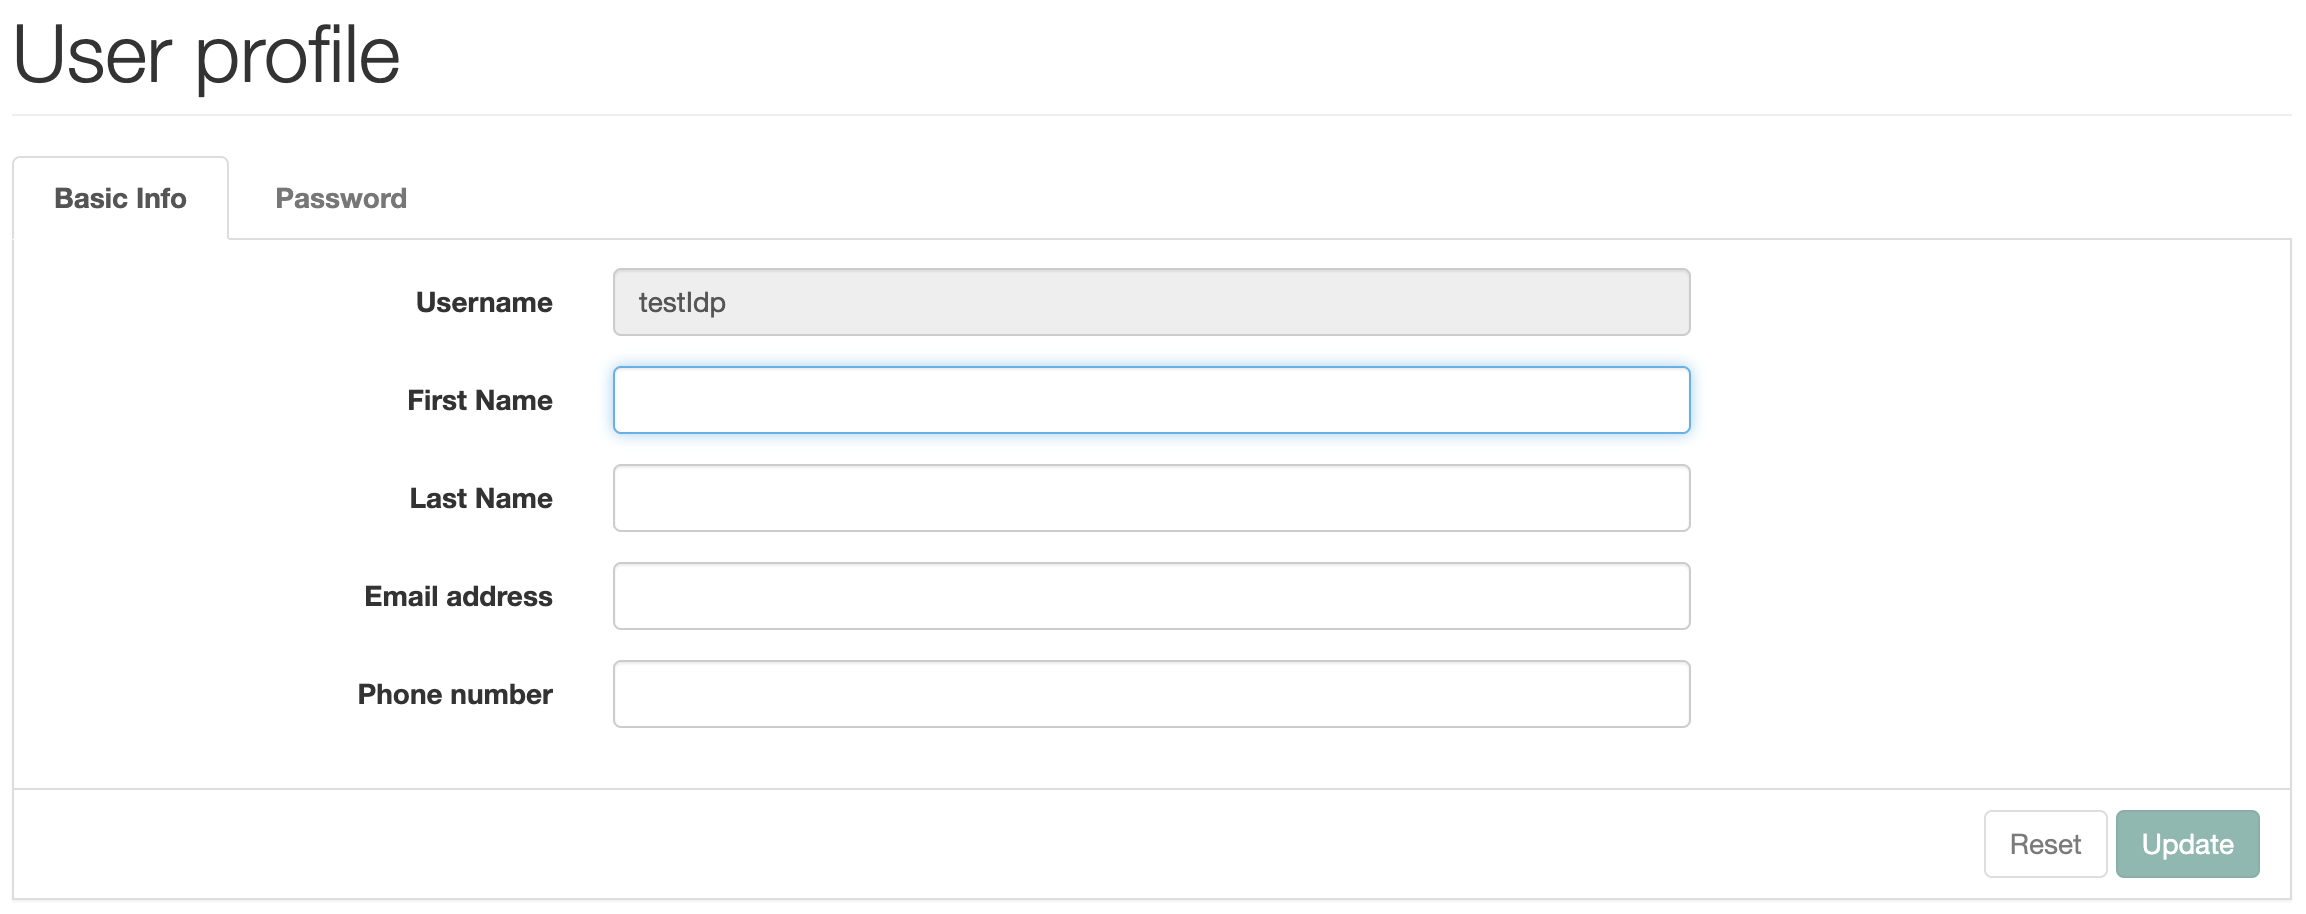
This will open a list of users. Create a new testIdp account
Log out of the OpenAM OAuth2/OIDC Server administration console and the OpenAM OAuth2/OIDC Client administration console or open a browser in incognito mode.
Open the OAuth2/OIDC Client authentication URL of the oauth chain http://sp.mycompany.org:8081/openam/XUI/?service=oauth
You will be redirected to authenticate to the OAuth2/OIDC Server. Enter the users testIdP credentials.
Confirm consent to access the test_client application user data
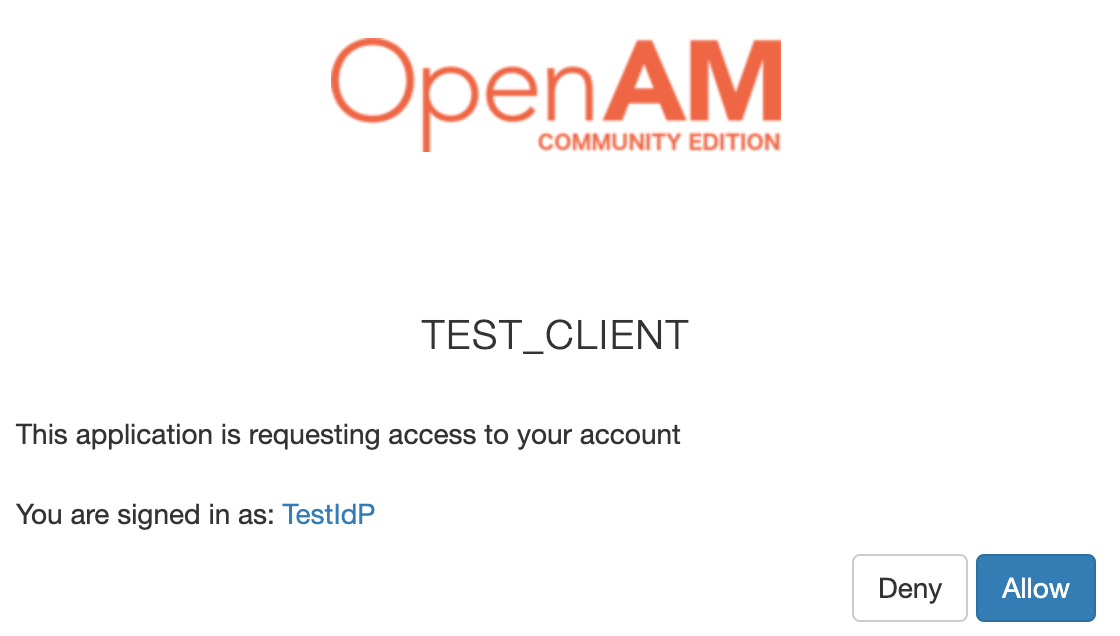
After accepting the consent, you well be redirected to OpenAM OAuth2/OIDC Client console with the OpenAM OAuth2/OIDC Server user credentials.