How to Protect WebSocket Connection with OpenAM and OpenIG
Original article: https://github.com/OpenIdentityPlatform/OpenIG/wiki/How-to-Protect-WebSocket-Connection-with-OpenAM-and-OpenIG
- Introduction
- Sample Websocket Service Introduction
- OpenIG Configuration
- OpenAM Configuration
- Test Solution
Introduction
This article is a continuation of the article How to Add Authorization and Protect Your Application With OpenAM and OpenIG Stack . The previous article described how to protect regular HTTP endpoints. In the following, we will protect a WebSocket connection with OpenAM authentication. To simplify the setup and deployment of services we will use Docker and Docker Compose tools.
Sample Websocket Service Introduction
To test WebSocket we will use a test echo-server. To run the service in Docker, create a docker-compose.yml file and add sample-service:
docker-compose.yml:
version: '3'
services:
  echo-server:
    image: jmalloc/echo-server
    restart: always
    ports:
        - "8082:8080"
    networks:
      openam_network:
        aliases:
          - echo-server
networks:
  openam_network:
    driver: bridge
Run the docker compose up command and after the service is started, you will see in the console something like this:
Echo server listening on port 8080.
OpenIG Configuration
Let’s setup OpenIG to return a static content with a WebSocket client application
Create folder openig-config go to the folder and create two files admin.json and config.json with the following contents:
admin.json
{
    "prefix" : "openig",
    "mode": "PRODUCTION"
}
config.json
{
  "heap": [],
  "handler": {
    "type": "Chain",
    "config": {
      "filters": [],
      "handler": {
        "type": "Router",
        "name": "_router",
        "capture": "all"
      }
    }
  }
}
Add a static HTML page with an UI for testing WebSocket connection. In openig-config folder create static directory and add ws-client.html file with the following contents:
<!DOCTYPE html>
<html lang='en'>
<head>
<meta charset='UTF-8'>
<title>WS-Client</title>
<style>
#log p {
margin: 0;
}
#log p.error {
color: red;
}
</style>
</head>
<body>
<div>
<h1>WS-Client</h1>
<button id='connect' type='button'>Connect</button>
<button id='send' type='button'>Send Message</button>
<br>
<label for='log'>Log:</label>
<div id='log'></div>
</div>
<script>
const connectBtn = document.getElementById('connect');
connectBtn.onclick = connect;
let socket;
function connect() {
appendToConsole('connecting...')
const endpoint = 'ws://' + location.host + '/ws-handler';
socket = new WebSocket(endpoint);
socket.onmessage = function(event) {
appendToConsole('got response message from server: ' + event.data);
};
socket.onopen = function () {
appendToConsole('connected')
};
socket.onerror = function (e) {
appendToConsole('socket error occurred', true);
}
socket.onclose = function () {
appendToConsole('socket connection closed')
}
}
const sendBtn = document.getElementById('send');
sendBtn.onclick = function () {
if(socket.readyState !== WebSocket.OPEN) {
appendToConsole('socket is not open', true);
return;
}
appendToConsole('sending message...');
try {
socket.send('Test message');
} catch (e) {
appendToConsole('error sending message: ' + e.message, true)
}
}
function appendToConsole(message, error) {
let className = '';
if (error) {
console.error(message);
className = 'error';
} else {
console.log(message);
}
const log = document.getElementById('log');
const p = document.createElement('p');
p.innerText = message;
p.className = className;
log.append(p)
}
</script>
</body>
</html>
Then add OpenIG routes for the echo-server UI and WebSocket endpoints. Create a routes folder in the openig-config folder.
In routes folder create a 10-ui.json for UI and a 10-websocket.json as well.
10-ui.json
{
    "name": "${matches(request.uri.path, '^/ui')}",
    "condition": "${matches(request.uri.path, '^/ui')}",
    "monitor": true,
    "timer": true,
    "handler": {
       "type": "Chain",
       "config": {
          "filters": [],
          "handler": "WSClient"
       }
    },
    "heap": [
       {
         "name": "WSClient",
         "type":"StaticResponseHandler",
         "config": {
            "status": 200,
            "entity": "${read(system['openig.base'].concat('/config/static/ws-client.html'))}"
         }
       }
    ]
 }
Let’s setup access to the sample service instance via OpenIG. Remove the ports section from the docker-compose.yml file and add OpenIG.
10-websocket.json
{
  "name": "${matches(request.uri.path, '^/ws-handler')}",
  "condition": "${matches(request.uri.path, '^/ws-handler')}",
  "monitor": true,
  "timer": true,
  "handler": {
    "type": "Chain",
    "config": {
      "filters": [
        {
          "type": "HeaderFilter",
          "config": {
            "messageType": "REQUEST",
            "add": {
              "Host": [
                "${matchingGroups(system['ws.secured'],\"(http|https):\/\/(.[^\/]*)\")[2]}"
              ]
            },
            "remove": [
              "Sec-Websocket-Key",
              "Sec-Websocket-Version",
              "Host",
              "Origin"
            ]
          }
        }
      ],
      "handler": "EndpointHandler"
    }
  },
  "heap": [
    {
      "name": "EndpointHandler",
      "type": "DispatchHandler",
      "config": {
        "bindings": [
          {
            "handler": "ClientHandler",
            "capture": "all",
            "baseURI": "${system['ws.secured']}"
          }
        ]
      }
    }
  ]
}
We need to remove headers from the client’s original HTTP request to establish a proper WebSocket connection from OpenIG instance to the secured-service.
Add OpenIG service to the docker-compose.yml file.
...
    openig:
    image: openidentityplatform/openig:latest
    build: .
    volumes:
      - ./openig-config:/usr/local/openig-config/config:ro
    ports:
      - "8081:8080"
      - "8000:8000"
    environment:
      CATALINA_OPTS: -Dopenig.base=/usr/local/openig-config -Dsecured=http://echo-server:8080 -Dopenam=http://openam.example.org:8080/openam -Dws.secured=ws://echo-server:8080 -Dorg.openidentityplatform.openig.websocket.ttl=180
    networks:
      openam_network:
        aliases:
          - openig.example.org
...
System properties from OpenIG example configuration
| Peroperty | Description |
|---|---|
| secured | points to the HTTP service |
| ws.secured | Points to the WebSocket service |
| openam | points to OpenAM instance (we will use this setting in the future chapters) |
| org.openidentityplatform.openig.websocket.ttl | The interval in seconds, during which the validity of the session is checked (default 180) |
Run the docker compose command using the updated file. After OpenIG and sample servie are up, open http://localhost:8080/ui/ws URL in your browser. You’ll be able to establish a WebSocket connection and all interactions will be proxied by OpenIG.
OpenAM Configuration
Let’s add OpenAM authentication to our stack.
Add OpenAM service to the docker-compose.yml file.
...
  openam:
    image: openidentityplatform/openam
    volumes:
      - ./data/openam:/usr/openam/config
    ports:
      - "8080:8080"
    networks:
      openam_network:
        aliases:
          - openam.example.org
...
The ./data/openam folder is needed to store OpenAM persistent configuration.
Add FQDN openam.example.org and openig.example.org to hosts file:
127.0.0.1 openam.example.org openig.example.org
Run the docker-compose file, setup OpenAM, add cookie domain and setup jwt endpoint as described in How to Add Authorization and Protect Your Application With OpenAM and OpenIG Stack
article.
Add OpenAM token validation filters to the 10-websocket.json file.
       {
          "type": "ConditionalFilter",
          "config": {
            "condition": "${empty contexts.sts.issuedToken and not empty request.cookies['iPlanetDirectoryPro'][0].value}",
            "delegate": {
              "type": "TokenTransformationFilter",
              "config": {
                "openamUri": "${system['openam']}",
                "realm": "/",
                "instance": "jwt",
                "from": "OPENAM",
                "to": "OPENIDCONNECT",
                "idToken": "${request.cookies['iPlanetDirectoryPro'][0].value}"
              }
            }
          }
        },
        {
          "type": "ConditionalFilter",
          "config": {
            "condition": "${not empty contexts.sts.issuedToken}",
            "delegate": {
              "type": "HeaderFilter",
              "config": {
                "messageType": "REQUEST",
                "remove": [
                  "Authorization",
                  "JWT"
                ],
                "add": {
                  "Authorization": [
                    "Bearer ${contexts.sts.issuedToken}"
                  ]
                }
              }
            }
          }
        },
        {
          "type": "ConditionEnforcementFilter",
          "config": {
            "condition": "${not empty contexts.sts.issuedToken}",
            "failureHandler": {
              "type": "StaticResponseHandler",
              "config": {
                "status": 401,
                "reason": "Found",
                "headers": {
                  "Content-Type": [
                    "application/json"
                  ],
                },
                "entity": "{ \"Error\": \"Unauthorized\"}"
              }
            }
          }
        }
These three filters do the following:
The first filter converts OpenAM token to JWT and sets to the request context. The second filter adds JWT to the OpenIG to the target service request. The third filter checks if there is a JWT in the request context and if not, responds with the 401 error. If authentication
Test Solution
Navigate to http://openig.example.org:8081/ui and press the Connect button. You will see the connection error message.
Log:
connecting...
socket error occurred
socket connection closed
Open the next tab in your browser and navigate to the OpenAM URL http://openam.example.org:8080/openam
Login to OpenAM, return to http://openig.example.org:8081/ui tab and try to connect again.
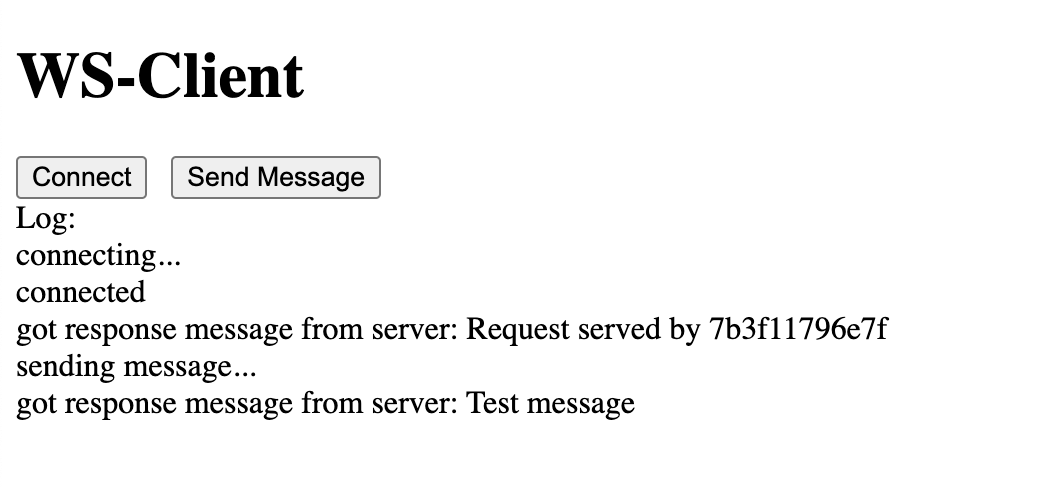
You will see the following
connecting...
connected
Press the Send Message button and you should see the following messages
sending message...
got response message from server: Test message
Let’s logout from OpenAM go back to http://openig.example.org:8081/ui/ws wait 3 minutes (as set in the org.openidentityplatform.openig.websocket.ttl setting) and try to send a message.
We will see the following:
sending message...
socket connection closed