SSO Configuration: OpenIG as SAML Service Provider for OpenAM
Introduction
The SAML 2.0 protocol is the standard for Single Sign-On (SSO) in enterprise environments. In this guide, we will show you how to use OpenIG as a proxy and service provider to easily add SAML authentication to any of your applications without changing its code.
Preparation
- To simplify service deployment, we will use OpenAM and OpenIG’s Docker images. Therefore, you must have Docker installed.
-
Enter the host names for OpenAM and OpenIG in the
hostsfile. On Windows systems, the hosts file is located in theC:\Windows/System32/drivers/etc/hostsdirectory, and on Linux or Mac OS, it is located in/etc/hosts.127.0.0.1 openam.example.org openig.example.org
Configuring OpenAM
Installing OpenAM
Deploy the OpenAM container with the command:
docker run -h openam.example.org -p 8080:8080 --name openam openidentityplatform/openam
And perform the initial configuration:
docker exec -w '/usr/openam/ssoconfiguratortools' openam bash -c \
'echo "ACCEPT_LICENSES=true
SERVER_URL=http://openam.example.org:8080
DEPLOYMENT_URI=/$OPENAM_PATH
BASE_DIR=$OPENAM_DATA_DIR
locale=en_US
PLATFORM_LOCALE=en_US
AM_ENC_KEY=
ADMIN_PWD=passw0rd
AMLDAPUSERPASSWD=p@passw0rd
COOKIE_DOMAIN=example.org
ACCEPT_LICENSES=true
DATA_STORE=embedded
DIRECTORY_SSL=SIMPLE
DIRECTORY_SERVER=openam.example.org
DIRECTORY_PORT=50389
DIRECTORY_ADMIN_PORT=4444
DIRECTORY_JMX_PORT=1689
ROOT_SUFFIX=dc=openam,dc=example,dc=org
DS_DIRMGRDN=cn=Directory Manager
DS_DIRMGRPASSWD=passw0rd" > conf.file && java -jar openam-configurator-tool*.jar --file conf.file'
OpenAM Identity Provider Setup
- Access the administrator console via the link http://openam.example.org:8080/openam. Use the login
amadminand passwordpassw0rd. - Select Top Level Realm
- Go to Create SAMLv2 Providers → Create Hosted Identity Provider
- Set Metadata Name:
openam - In the Signing Key setting, select
test - Enter the name of the Circle of Trust, for example,
cot - In the Attribute Mapping section, add the mapping uid → uid, mail → mail
- Click Configure
OpenAM Fedlet Configuration
- Open the administrator console
- Select Top Level Realm
- Go to Create Fedlet Configuration
- Enter the fedlet name in the Name field, for example, openig.
- Set the Destination URL of the Service Provider which will include the Fedlet to the URL that points to OpenIG:
http://openig.example.org:8081/saml - In the Attribute Mapping section, add the mapping uid → uid, mail → mail
-
Click Create
The Fedlet settings will be saved in the container in the directory
/usr/openam/config/myfedlets/openig/Fedlet.zip.Copy the settings to the host machine using the command:
docker cp openam:/usr/openam/config/myfedlets/openig/Fedlet.zip .
Preparing a test user
- Open the administrator console
- Select Top Level Realm
- In the left pane, select Subjects
- In the list of accounts, open the
demoaccount - In the Email Address field, enter
demo@example.orgor another valid email - Click Save
OpenIG Setup
Preparing OpenIG Configuration Files
- Create a directory for OpenIG configuration files
openig-saml - Add a directory
configto it -
In the
configdirectory, create the filesadmin.jsonandconfig.json:admin.json:{ "prefix" : "openig", "mode": "PRODUCTION" }config.json:{ "heap": [ { "name": "JwtSession", "type": "JwtSession" }, { "name": "capture", "type": "CaptureDecorator", "config": { "captureEntity": true, "_captureContext": true } } ], "handler": { "type": "Chain", "config": { "filters": [], "handler": { "type": "Router", "name": "_router", "capture": "all" } } } } - Add a directory for routes named
routesto theconfigdirectory. -
Add the default route
99-default.jsonto theroutesdirectory. OpenIG will serve static content on this route and will not require authentication:{ "handler": { "type": "DispatchHandler", "config": { "bindings": [ { "handler": { "type": "StaticResponseHandler", "config": { "status": 200, "reason": "OK", "entity": "<!doctype html> <html> <head> <title>Home</title> <meta charset='UTF-8'> </head> <body> <h1><a href='/app'>Login</a></h1> </body> </html>" } } } ] } }, "session": "JwtSession" } -
Start the OpenIG Docker container with the command. Note the mounted directory
/app-saml.docker run -h openig.example.org -p 8081:8080 --name openig \ -v ./app-saml:/usr/local/app-saml:ro \ -e "CATALINA_OPTS=-Dopenig.base=/usr/local/app-saml" \ openidentityplatform/openig -
Check if the application is working:
 $ curl -v http://openig.example.org:8081
 *   Trying 127.0.0.1:8081...
 * Connected to openig.example.org (127.0.0.1) port 8081 (#0)
 > GET / HTTP/1.1
 > Host: openig.example.org:8081
 > User-Agent: curl/7.81.0
 > Accept: */*
 >
 * Mark bundle as not supporting multiuse
 < HTTP/1.1 200
 < Content-Length: 146
 < Date: Mon, 24 Nov 2025 12:46:56 GMT
 <
 <!doctype html>
 <html>
 <head>
   <title>Home</title>
   <meta charset='UTF-8'>
 </head>
 <body>
   <h1><a href='/app'>Login</a></h1>
 </body>
Configuring SAML Fedlet in OpenIG
- In the
openig-samldirectory, create a directory namedSAML. -
Copy the contents of the Fedlet.zip archive that you received from OpenAM into this directory.
unzip Fedlet.zip cp conf/* app-saml/SAML/ - Create a route for obtaining credentials from SAML assertions
05-saml.json{ "handler": { "type": "SamlFederationHandler", "config": { "assertionMapping": { "uid": "uid", "mail": "mail" }, "redirectURI": "/app" } }, "condition": "${matches(request.uri.path, '^/saml')}", "session": "JwtSession" } -
Create a route for the application requiring SAML authentication
05-app.json:{ "handler": { "type": "DispatchHandler", "config": { "bindings": [ { "condition": "${empty session.uid}", "handler": { "type": "StaticResponseHandler", "config": { "status": 302, "reason": "Found", "headers": { "Location": [ "http://openig.example.org:8081/saml/SPInitiatedSSO" ] } } } }, { "handler": { "handler": { "type": "StaticResponseHandler", "config": { "status": 200, "reason": "OK", "entity": "<!doctype html> <html> <head> <title>OpenID Connect Discovery</title> <meta charset='UTF-8'> </head> <body> <h1>User: ${session.uid}, email: ${session.mail} </h1> </body> </html>" } } } } ] } }, "condition": "${matches(request.uri.path, '^/app')}", "session": "JwtSession" } -
Start the OpenIG container:
 docker run -h openig.example.org -p 8081:8080 --name openig \
   -v ./app-saml:/usr/local/app-saml:ro \
   -e “CATALINA_OPTS=-Dopenig.base=/usr/local/app-saml” \
   openidentityplatform/openig
Test the Solution
- Exit the OpenAM console or open your browser in incognito mode.
-
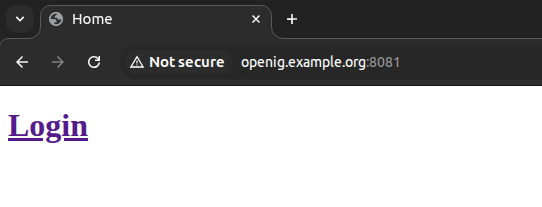
Open the link to the OpenIG application, which does not require authentication: http://openig.example.org:8081/.

- Click on the
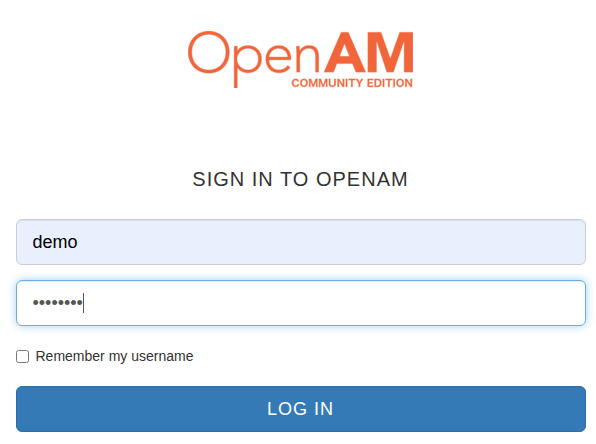
Loginlink. - The OpenAM authentication form will open.
-
Enter the demo user credentials. Login:
demo, password:changeit, and click the Login button.
-
You will be redirected to the application with the demo user credentials:

Conclusion.
We have successfully configured OpenIG as a Service Provider and implemented SAML 2.0 authentication via OpenAM. You can now use this approach to secure any applications in your infrastructure. The next step could be to configure Log Out.
For more details on configuring OpenAM and OpenIG, please refer to the documentation: